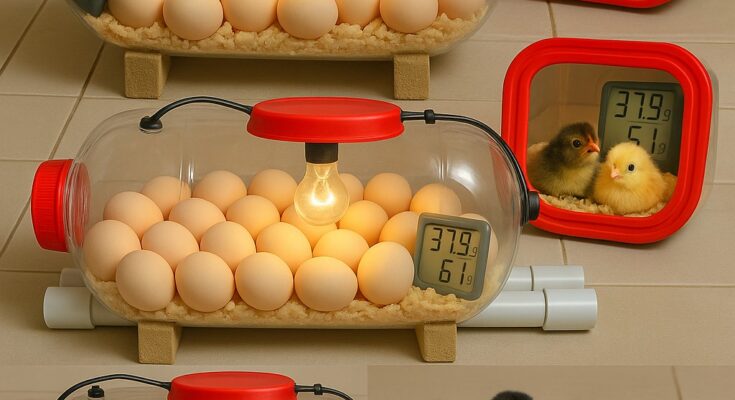
Hatching your own chicken eggs at home doesn’t need to break the bank. With a little creativity and a few basic supplies, you can build a homemade egg incubator from a recycled plastic water bottle—yes, really! Whether you’re a backyard homesteader, a science-loving parent, or just curious about raising your own chicks, this eco-friendly DIY project is a perfect place to start.
♻️ DIY Egg Incubator From a Water Bottle: Step-by-Step Guide
🧰 What You’ll Need:
-
1 large clear plastic water bottle (5L works best)
-
A small incandescent bulb or alternative heat source
-
Aluminum foil or reflective tape
-
Thermometer (digital preferred for accuracy)
-
Utility knife or strong scissors
-
Marker
-
Tape or hot glue gun
-
Small container for water (for humidity)
🧼 Step 1: Clean & Prep the Bottle
Wash the water bottle thoroughly and let it dry completely. Remove all labels to allow light and heat to circulate freely.
✂️ Step 2: Cut the Bottle in Half
Mark a line around the middle of the bottle. Cut carefully along this line to create a top and bottom half—these will become your lid and base.
🌬️ Step 3: Add Ventilation Holes
Use a knife tip or heated nail to poke several small holes around the top rim of the bottom half. This ensures your incubator gets proper airflow.
🔥 Step 4: Install Your Heat Source
Place your light bulb or mini heat pad inside the base, off to one side to create a warm zone. Secure it in place with tape or glue.
🔁 Step 5: Line With Reflective Material
Attach aluminum foil or reflective tape inside the base to distribute and retain heat evenly. This helps maintain a stable temperature inside the incubator.
🌡️ Step 6: Insert a Thermometer
Add a thermometer in the center, away from the direct heat source. Monitor it regularly to maintain ideal incubation temperatures (more on that below).
🧩 Step 7: Assemble the Incubator
Place the top half of the bottle over the base to form the lid. Ensure it fits snugly. Use tape if needed to seal any gaps that may leak heat or humidity.
💧 Step 8: Add Humidity
Set a small water container inside the base, away from the heat source. This helps maintain proper humidity for healthy egg development.
🐣 Guide to Hatching Chicken Eggs at Home
Now that your DIY incubator is ready, let’s dive into the key steps to successfully hatch your own chicks.
🥚 Choosing the Right Eggs
✅ Fertile Eggs Only
-
Make sure the eggs are from hens that have been with a rooster.
-
Buy from trusted farms or breeders that guarantee fertility.
🕒 Freshness Matters
-
Use eggs that are 7 days old or less.
-
Store eggs at room temperature with the pointy end down.
🧽 Clean, But Not Washed
-
Avoid washing eggs, as it removes their protective coating.
-
Light dirt can be gently wiped off with a dry cloth.
🔄 Uniformity Is Key
-
Pick eggs that are medium-sized and similar in shape.
-
Avoid cracked, misshapen, or unusually large eggs.
🌡️ Incubation Basics
🔥 Temperature
-
Maintain 37.5°C to 38°C (99.5°F–100.4°F) consistently.
-
Avoid wide fluctuations to prevent embryo damage.
💧 Humidity
-
Days 1–18: Keep humidity at 50–55%.
-
Days 19–21: Raise humidity to 65–70% for hatching.
💨 Ventilation
-
Ensure constant airflow through the ventilation holes.
-
Stale air can harm embryo development.
🔄 Turning the Eggs
-
Turn eggs 3–5 times daily to prevent sticking.
-
Stop turning 3 days before hatching (lockdown period).
🔦 Monitoring With Candling
Use a flashlight or specialized candler to check on embryo development:
-
Day 7: Look for visible blood vessels and a dark spot.
-
Day 14: Embryo should be larger, and movement may be visible.
-
Day 18: Dark mass with little room left inside the egg.
🐥 Hatching Time
3 Days Before Hatch (Day 18)
-
Stop turning eggs
-
Boost humidity
-
Avoid opening the incubator
During Hatch (Days 20–21)
-
Be patient—chicks can take hours to hatch
-
Don’t assist unless absolutely necessary
-
Let chicks dry inside the incubator before removing
💡 Pro Tips for Successful Hatching
-
Test your incubator for 24 hours before adding eggs
-
Keep temperature logs to monitor stability
-
Avoid drafts or cold rooms where heat may escape
-
Don’t overcrowd—give each egg enough space
🌱 Why Build Your Own Incubator?
-
Low-Cost: Great for budget-conscious hobbyists
-
Eco-Friendly: Reuses materials that would otherwise be waste
-
Educational: A fantastic hands-on project for kids and adults
-
Satisfying: Watching chicks hatch from your own DIY incubator is magical
🎉 Conclusion
Crafting an egg incubator from a recycled water bottle proves that you don’t need fancy equipment to start your hatching journey. With basic tools and a little patience, you can create a sustainable, affordable, and effective incubation setup right from your home.
This DIY project opens the door to raising your own backyard flock, teaching kids about life science, or simply enjoying the marvel of nature. Whether you’re experimenting for fun or starting a mini farm, this homemade incubator is your first step toward fluffy success.
Happy hatching, and may your broods be bountiful! 🐥🌿


